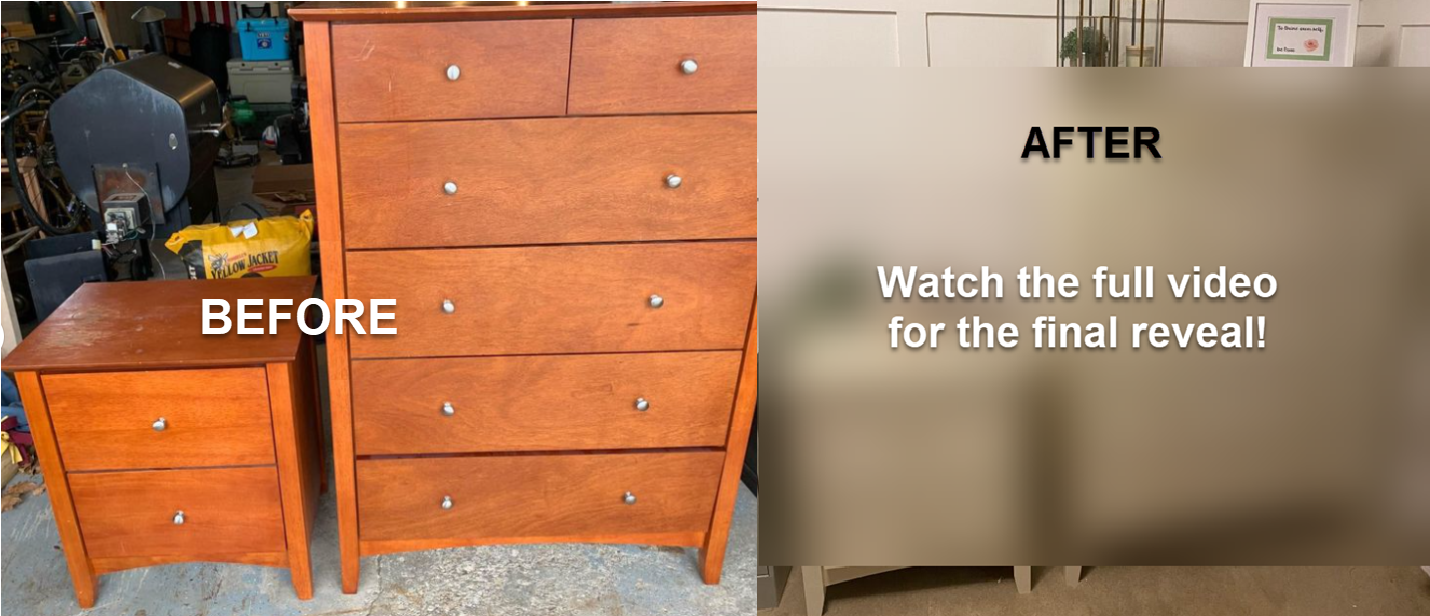
Products/Materials:
- Krud Kutter
- Lemon Essential Oil (beneficial, but not necessary)
- Wood Filler
- Wood Drawer Slide repair kit
- Mod Podge
- Textured Wallpaper
- Lots of Sandpaper (220 grit)
- Wood Slats – 1/4″ x 1 1/4″
- Drawer Knobs (10)
- Drawer Handles (2)
- Kilz All-Purpose Primer
- Rust-oleum Chalk Paint – Chiffon Cream
- Polycrylic Water based top coat – Clear Matte
Tools:
See full video with details below!
Instructions:
- Clean thoroughly, inside and out. I use Krud Kutter, followed by simple water and dish soap. As an added (but unnecessary) step, I add several drops of lemon essential oil to the water, just to help improve the smell of the dresser. Keep in mind that these will likely be used to store clothes, and I don’t want it smelling like Krud Kutter, or other harsh chemicals. I also like to use Mint, Sweet Orange, or Lavender, depending on what I have on hand. I also removed all the old drawer knobs, which were in pretty good shape, so I kept them to use on a future project.
- Once dry, sand with 220-grit. Because I was going to be painting the dressers, and using wallpaper on the drawer fronts, I just scuffed the surface to allow the paint/glue to bond better. I also removed any broken wood slides, and repaired one of the slides on the drawers.
- The one area that I had to pay more attention to was the top of the small dresser. This had water damage, so I had to sand pretty aggressively. Unfortunately, this meant burning through the veneer. To fix the top of the small dresser, I added a layer of Bondo. I personally don’t like using Bondo unless I have to. It has a VERY noxious smell, so I prefer other methods when possible. Because this was a dresser top, I felt Bondo was the best choice. Once the layer of Bondo was dry, I sanded it smooth.
- After sanding and repairing a few things, I added 1 coat of Kilz All-Purpose Primer to the dresser frames.
- While I waited for the primer to dry, I began attaching the textured wallpaper to the drawer fronts. It wasn’t necessary to make sure the edges of the wallpaper were clean with the drawer edges, but what WAS important was making sure the pattern of the wallpaper was consistent for each drawer. Once I was certain that each drawer would come out looking exactly the same, I attached the wallpaper to the drawer front using Mod Podge.
- While I waited for the Mod Podge to set, I cut the slats that would go around the edges of the drawer fronts. Once I had my measurements, I simply cut each slat at 45 degree angles, and attached using wood glue, and 3/4″ brad nails.
- Once the drawer fronts were complete, I used wood filler to fill in all the nails holes (from the 3/4″ brad nails), the corner seams, as well as the gap between the slap and the drawer edge. I waited 24 hours for this to dry before sanding with 220-grit, adding more wood filler if necessary.
- I started painting with my paint sprayer, using Rust-oleum Chalk Paint – Chiffon Cream. I ended up not liking this method. I think I’m just not very skilled with a paint sprayer, so I ended up rolling the paint on all the drawers, and using the roller to also even out the coat on the dresser frames. I added about 2 coats (3 in some areas) until the coverage was to my liking.
- I used my paint sprayer again (when in doubt, try, try again!) to spray the Polycrylic Water based top coat. I didn’t want to use a brush or a roller because the brush would leave streaks, and the roller tends to leave bubbles. It worked nicely for the drawers. I had to be very careful with the dresser frames to avoid drips. Unfortunately, where I live (Wisconsin), it is very cold, so paint doesn’t cooperate well in the cold. I think this was leading to some issues with painting also, but my garage isn’t heated and I don’t have anywhere else to spray. Ah well, when DIY’ing, sometimes you have to use what you got! Am I right?
- Once the paint on the drawer fronts was dry, I was able to attached the hardware. For the larger drawers, I simply used the same holes that were used before, with new hardware. For the smaller drawers, I wanted to add new hardware, which meant drilling new holes. I used my Drawer Handle Jig to make sure the new holes would be lined up perfectly. Drilled the holes and attached the handles.
- The last step before the final assembly was to add the new drawer slides to replace the broken ones. I hadn’t anticipated needing this many drawer slides (5) to be replaced. It added about $50 of expense and a few days delay to the project, but really needed to be done. The old drawer slides were completely cracked. I also made sure to add a layer of wax to the slides so they would operate super smooth!
- After all that it was simply re-assembling everything, and staging the final product to list for sale!

Let’s Talk $:
- Initial Investment: $50
- Materials: $250
- Knobs/drawer pulls, Paint, Top coat, wallpaper, lumber, and drawer slides.
- Time invested: approximately 8 hours
- Listing Price: $700
- Profit if it sells for full list price: $400
Please SUBSCRIBE to be notified when new project posts come out!
Happy DIY’ing!

