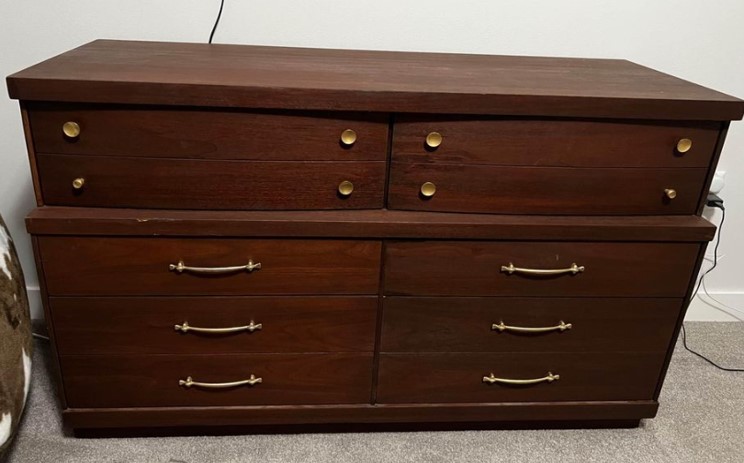
This was another piece I was really excited about. This style of dresser is really popular right now and I wanted to try applying a paint wash using a paint I had never used before. I encountered a few unexpected areas of damage, so I ended up having to get creative to complete the piece the way I had imagined, but I think the finished piece ended up looking great!
See below for the full video Tutorial.
Products/Materials:
- Lemon Essential Oil
- Sandpaper
- English Chestnut Stain
- Jolie Eucalyptus Matte Paint
- Clean Lint-free rags
- Paint Brush
- Zinsser Primer
- Jolie Finishing Wax- Clear
- Rustoleum Spray Paint
- Brass Knobs
Tools:
Instructions:
- Clean the entire piece. This piece was in very good shape so I didn’t need to use a heavy chemical like Krud Kutter, but I still wanted to wipe it down. I also removed the hardware.
- I use warm water with dish soap. I like to add some Essential Oil to the water to give a nice smell. I’ve used Lavender, Orange, and Lemon. Any of these work well.
- Next I sanded the entire piece either by hand or using my Orbital Sander. I hand sanded the drawers because I wasn’t sure how thick the veneer was, and I wasn’t sure what kind of shape it was in. I’m glad I did, as there was some repaired veneer damage on a couple of the drawers.
- I had to fix these spots because they were white in color, and really stuck out. I started by staining the small spots with English Chestnut Stain. This color was close to the base color. I added a couple lines to appear like wood-grain using the very scientific method of using makeup brush and a pencil dipped in stain. This actually worked pretty well!
- I applied several coats of paint wash (Paint + water) to each drawer front using Jolie Eucalyptus Matte Paint. Like other stains, a paint wash will change the color of the wood, but allow the wood-grain to shine through.
- The first coat I apply the paint wash, and then wipe away using a WET rag. I allow this to dry completely.
- The second (and any subsequent) coats, I apply the paint wash, and then wipe away with a clean lint-free DRY rag. I am VERY careful to use almost a buffing motion so I don’t leave streaks in the paint wash.
- For the drawer hardware, I sanded each drawer pull using 220-grit sandpaper. This is done so the spray paint will adhere better. The first coat I added is a Metallic Warm Gold. The second coat was a Metallic Gold, and then finished with a Gloss Clear spray paint.
- To finish the drawers, I applied clear Jolie Finishing Wax. This is simply buffed on using a clean lint-free rag.
- I wanted to add a base to this piece. So I decided to add the DIY Wife base. She has a great tutorial here.
- I used Red Oak for the base. I stained it using English Chestnut Stain first so it would be the same undertone as the rest of the desk. I waited a full 24 hours for the stain to dry, and then applied the same paint wash as the drawer fronts.
- For the dresser frame, I started by applying Zinsser Primer. Once dry, I lightly sanded using 220-grit sandpaper to eliminate the brush strokes.
- Using Jolie Eucalyptus Matte Paint, I applied 2-3 coats to the dresser frame.
- I added an extra coat to the top of the dresser since that generally takes the most wear and tear.
- To finish the dresser, I applied a healthy coat of Jolie Finishing Wax- Clear, and added the original handles as well as some new Brass Knobs for the top drawers.
Let’s Talk $
- Initial Investment: $225
- Materials: $93
- Paint, finish coat, sandpaper, lumber, etc.
- Time invested: approximately 8 hours
- Listing Price: $650
- Profit if it sells for full list price: $332
Please SUBSCRIBE to be notified when new project posts come out!
Happy DIY’ing!


