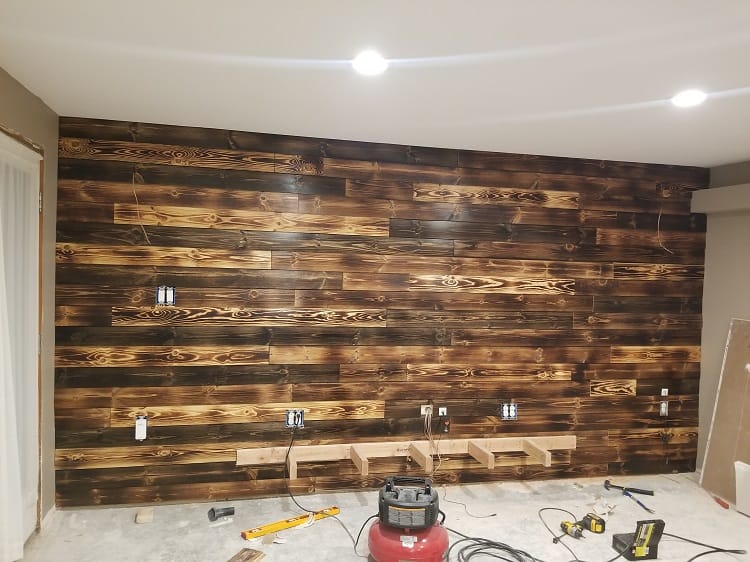
A shiplap wall is a great way to build an accent wall.
A few years ago, I completely gutted and renovated my basement. The intention was to create a more functional space where the family could gather. What better way to do that than to build a “movie theatre”? The wall where the projector screen would go was a perfect space to build an accent wall.

Why is it called “shiplap”? It’s called that because of the overlapping nature of the boards. It was originally used on ships to keep water from seeping into the seams.

To get the look I wanted, I used rough sawn 1 x 6″ pine shiplap planks from my local home improvement store. They came in 6-packs at 8 feet long. I charred them first, and then stained them with several different color stains.
I knew I wanted them to be varied in color, so I picked 3 different stain colors: Minwax Jacobean, Minwax Provincial, and Varathane Kona. Since I was going to be charring the planks, I also planned to leave some “natural”, or clear coated.


The planks I purchased had a smooth and a rough side. I liked the smooth side better for this project, so the rough side is the backside. I didn’t sand them because I wanted the rustic look, and again I knew I was going to be charring them to add texture anyway. These planks however, could be used with either side facing outward, if that is your preference.
To get the charred look, I used a propane torch to lightly burn each plank. The trick is to keep the flame MOVING so you don’t wind up with polka dots. Kind of like painting, but with fire. SAFETY FIRST: Follow all necessary safety precautions when using propane gas and check your area’s fire safety regulations to ensure burning is allowed!!!!

After all the planks had been torched, I picked several to simply apply a clear polyurethane. I stained 3 planks each using 3 different stain colors: Minwax Jacobean, Minwax Provincial, and Varathane Kona. After staining, I sealed all planks with a clear satin polyurethane.

I decided to start from the top. I made sure to stagger the shiplap both in length and the 4 different colors of the boards. Working left to right, using my brad nail gun to nail each plank to the studs. The wall is partially above and partially below grade, which is why half the wall is pink insulation, but the studs continue to the floor behind the drywall.

Half way done! The wiring hanging out is for the surround sound speakers. The rest of the wiring is buried in the wall, and comes out lower down where the floating shelf support is located.

The final look! Well, the final look before carpet was installed. I LOVE the way it turned out. The projector screen mounted SUPER easy, and watching movies in our own personal “Movie Theatre” with surround sound is a family favorite!
Please SUBSCRIBE to be notified when new project posts come out!
Happy DIY’ing!


How to build a fireplace - Two Hands DIY
[…] were then stained with Varathane Kona to match other wood work that was in the […]
How to stagger shiplap – Avoid these mistakes - Two Hands DIY
[…] these tips when laying vinyl flooring, hard wood flooring, etc.) Also check out my other posts on installing shiplap as an accent wall, installing shiplap on a ceiling, and installing vinyl […]