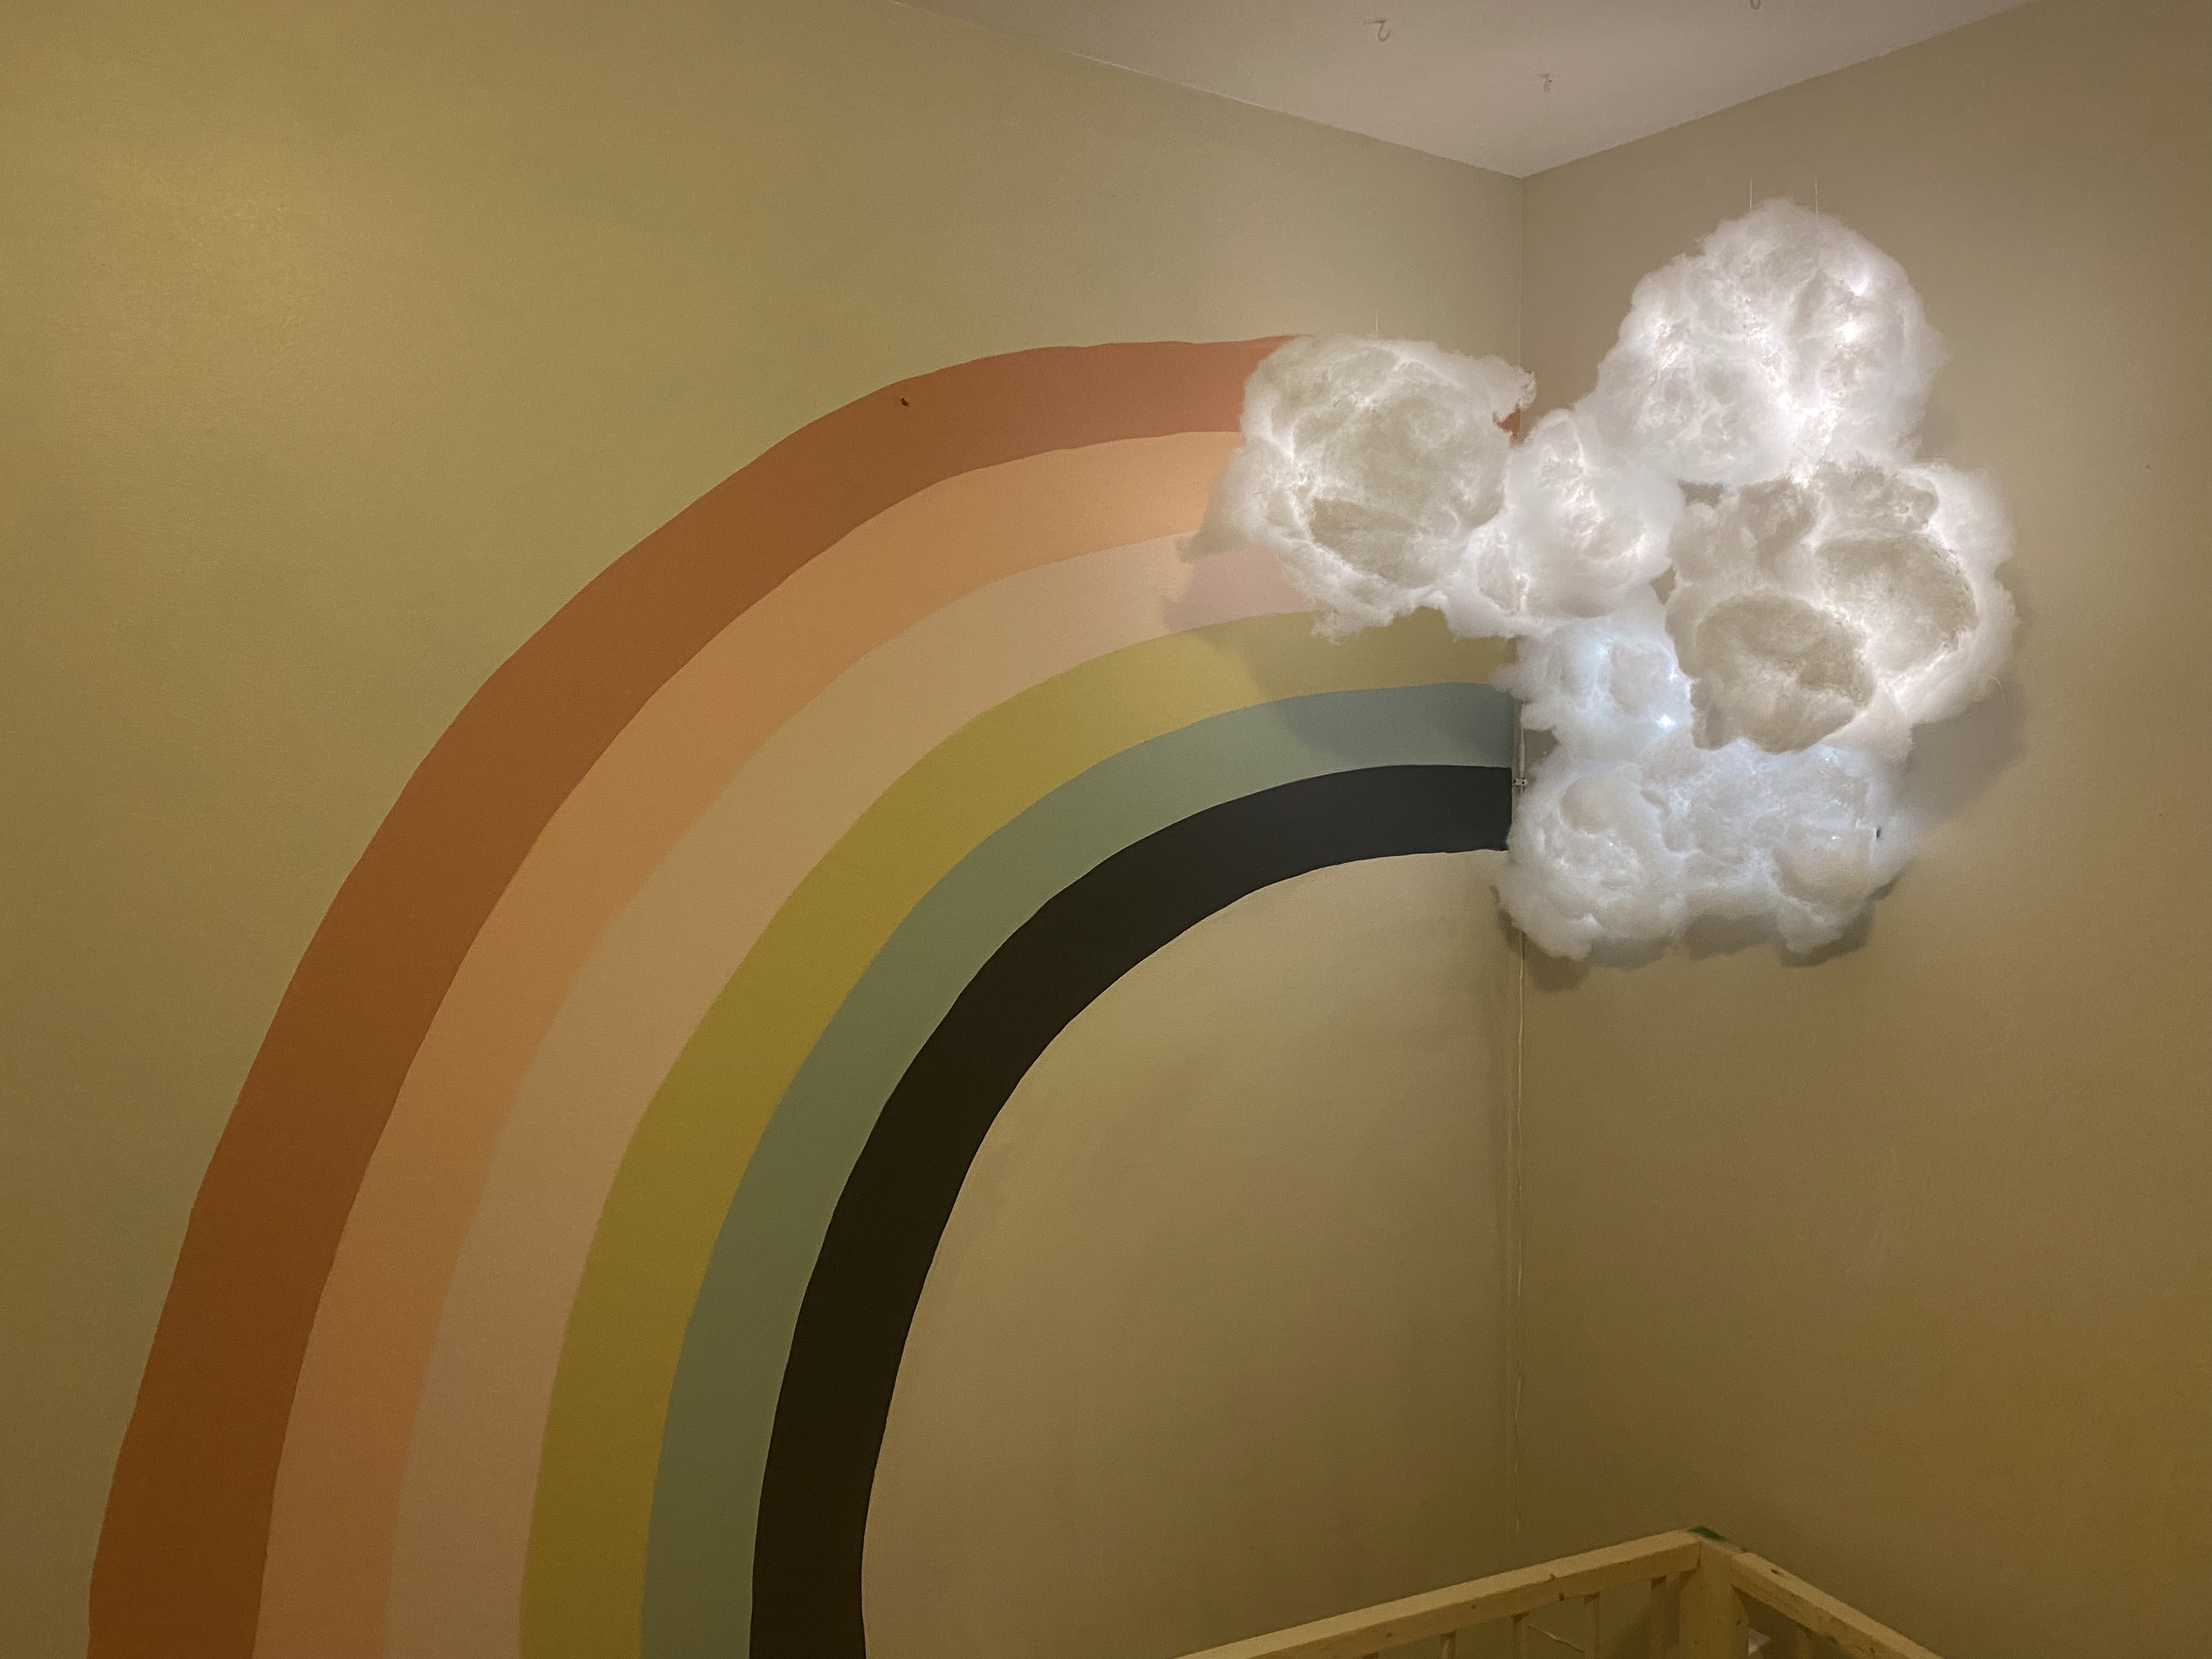
These puffy clouds are the PERFECT night light for my toddlers room. She recently moved into her “big-girl” bed, and I wanted something that would provide a little light, and maybe a bit of magic for her to make her room feel comfy and safe.
I started by building her big girl bed. It’s a floor bed made from 2×4’s and wooden dowels that fits a standard twin mattress. It was super easy to make! If you like it, you can get the full build instructions and a video tutorial here (credit to: Shara at Woodshop Diaries).

The whole room paint color is Sherwin Williams Kestrel White. The rainbow paint colors are Benjamin Moore: Dusty Mauve, Coral Buff, Pleasant Pink, Amulet, Wythe Blue, and Hale Navy. I bought a sample size of each, which was plenty for the one stripe of the rainbow. I really love to paint so I just painted the rainbow by hand. Each stripe is about 4-5″ wide. I love the way the rainbow turned out.

I liked the idea of having rainbow that met up with clouds, and I also wanted to add lights to the “clouds” so it would act as a soft nightlight for my toddler’s room.
DIY LED Cloud Materials:
DIY LED Cloud Instructions:
Start with some kind of plastic jug. I had a bunch of empty gallon milk jugs that I had saved for this project. Using the hot glue, attach the nylons string around the jug, so it will be centered underneath the string.

Allow the glue to fully cool. Remove the paper backing from the LED Light string, and wrap the LED light string randomly around the jug. You can add a little hot glue to hold in place better if needed.

Add a few blobs of hot glue in one section of the jug. Add a handful of Buffalo Snow to this section and press down a little bit to make sure the hot glue secures the Buffalo Snow in place. Work your way around the jug, adding handfuls of Buffalo Snow as you go. I simply added more hot glue to each section in order to create puffy clouds for each jug. I ended up making 4 clouds to hang.

I inserted hooks into the ceiling to hang the “clouds” from.

I loved the way they turned out, however, I didn’t like that 1) there was a cord hanging from the clouds, and since this was my toddlers room, I was concerned about the safety of the cord being on the wall right next to her bed, and 2) I wanted more than 4 clouds.
For the safety concern, I used these wire clips to secure the cord to the wall, and the On/Off switch had a built in sticky pad to attach to the wall.


For the outlet, I used this Dreambaby Outlet Covers.


For another set of “clouds” I decided to add some to the wall. I cut a couple empty milk jugs in half, and secured them to some poster board using hot glue. After the glue cooled, I cut the excess poster board off, leaving about an inch of edging around the jugs.


I added another LED light string. This one was battery operated. I tucked the battery pack inside the top jug that I left open a little bit, so I could change the batteries in the future. I used a drop of hot glue here and there to fully secure the LED Light String to the jugs.

Once the glue was cooled again, I added the Buffalo Snow by the handful, gluing as I went.

I taped a string to the back of these “clouds” and hung them on the wall just below the other ones.
Here is the final look of the rainbow and all the clouds. These “clouds” are floating right above where my toddler would be sleeping, so she can look up at the rainbow and fluffy clouds. They also give the whole room a really nice glow, so no need for a separate night light!


I’m still working on this room makeover, so stay tuned for more makeover updates!
Please SUBSCRIBE to be notified when new project posts come out!
Happy DIY’ing!


DIY Easy Framed Chalkboard Wall - Two Hands DIY
[…] out my post on the painted rainbow and LED Clouds I did for this room, and stay tuned for more toddler room makeover […]
Got extra Amazon boxes? Create some beautiful wall decor! - Two Hands DIY
[…] something. Other things I’ve done in her room were creating a framed chalkboard wall, and a painted rainbow with LED light up clouds, if you want to check out those […]